
There is one inescapable thing you will see at every single restaurant in the world: someone taking a picture of their food. It’s not just Asians either, anyone in any restaurant can be a creator and purveyor of food porn.
The smallest of deviations--a sunbeam shining through the window, someone walking by in the background, a five degree rotation of the plate--each little thing has the potential to make the story impactful, or make the food look bland and unpalatable.
This first of a three-part introduction to food photography will cover basic ideas and techniques that will help you take better pictures when dining out.
The most common scenario for food photography, the restaurant poses the biggest challenge for producing pictures which tell a story or create an emotional response. Restaurants are filled with variables you can’t control: someone can walk through a shot creating a distraction in the picture; the lighting in restaurants is often insufficient; there can be too many or not enough props on the table to set the scene; and you have little control over how the food will look.
Disturbing other patrons with an extremely bright flash fiddling with your food until it is tepid and is no longer an expression of the chef’s skill and vision is disrespectful to the restaurant. So, avoid the use of flashes and try to keep your picture taking to a minimum.
To take the best picture, light and composition are the two most important things to keep in mind. Lighting in restaurant is possibly the most challenging factor in this space.
Lighting
Restaurants are often dark with different types of light, both of which can have dramatic effects on the quality of the picture. Dark settings, or low light, force digital cameras to make their sensors more sensitive to light by increasing the ISO. This has the side effect of noise, not being able to capture details and colour in a true-to-life fashion.
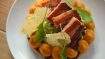
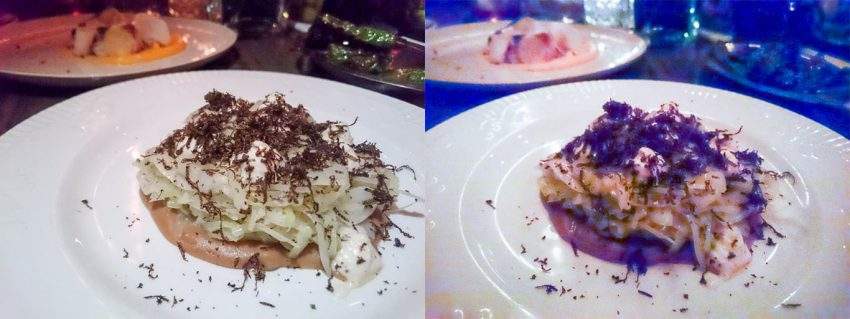
Both pictures were taken with the same camera phone (a Sony Xperia Z3). The picture on the left had a secondary source of lighting, shot at a moderate ISO. The picture on the right was taken at a high ISO in the dark and was brightened up after. As you can see, the details in the strands of truffle and the shredded cabbage are lacking in the picture on the right. The colours are washed out and there are stray colours all over the picture. In low light, the sensor has trouble picking up all the details and has to work hard to “guess” the information it is receiving, resulting in a degraded picture.
This is detrimental to food photography since the most vital factors are colour and detail. Think of an appetizing salad. It should be vibrantly green, each leaf should be crisp and rigid on the plate. Conversely, if the salad takes on the colour of pickled olives and the shape of mashed potatoes, it would not look very appetizing at all.
In a restaurant, you can capture colour and details in a number of ways. The easiest way, if there is still light outside, is to ask to be seated near a window or at a well-lit table with overhead lights. Natural daylight is what most cameras are calibrated for and using as much of it as possible will produce the best lighting for any picture. The one thing to worry about is multiple sources of lighting. Different types of light have different “temperatures”.
Different temperature of lights will have different effects on the colors read by the camera. Daylight is neutral, while regular incandescent light bulbs have a warmer light.
Warmer lighting will make things look yellow or orange. Cooler lights, like flashes, will give the picture a blue tinge. Extremes of both can easily wash out or alter the colours of the food in the picture. Most cameras will try to compensate if the picture is predominantly cool or warm, but a strong mixture of both will be difficult to control, so try to keep it to one temperature of light if possible.
The second option, if it is nighttime or if you don’t have access to window seating but do have access to a dining companion and their camera phone, is to use their flash to illuminate your picture. Have them keep their flash on (using a flashlight app), and cover the light with a white semi-transparent napkin. This will soften the light, scattering it around a bit and reducing the intensity, which helps to create a more natural light effect and prevent any details from being washed out on spots receiving too much light, aka “hotspots”. This is how the above picture on the left was illuminated.
Avoid using your own flash, as the flash on your camera is difficult to soften, and often produces very harsh and inconsistent light in your pictures because of the placement of the flash relative to the lens. This washes out both detail and colour.
Keep in mind that using a flash may disrupt the dining experience for your companions and those around you. It may also be inappropriate at some restaurants entirely. Use good judgement, and check with the wait staff if you are unsure.
Composition
Composing the picture is about telling the story of your dining experience. The most common way to take the photo head-on, with the dish right in the middle of the shot.
Although this is entirely appropriate in some cases and conveys a great at-a-glance overview of the dish, this often produces a very boring and repetitive picture, as well as fails to tell a story about the dish that you’re enjoying.
Rule of thirds
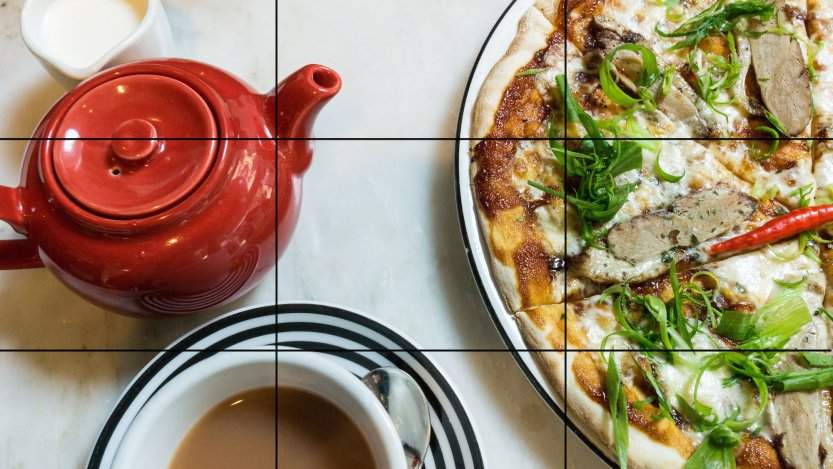
The rule of thirds (as pictured at the top) is a general rule in photography in which the picture is divided into a 3X3 grid. Aligning items in the picture along these grid lines, and especially at the points where the lines intersect, help to guide the eye to specific elements in the picture.
In this picture, the pizza is aligned on the right, while the eye is drawn to the teapot and the cup of milk tea along the two intersection points on the left. This picture puts into context a meal enjoyed on a Hong Kong afternoon with friends.
Using multiple elements which support each other helps to provide content to the picture and tell the supporting story.
Angle
Shooting from straight above also poses another challenge: it makes the plate look flat. Food on a plate has height. A pile of mashed potatoes with gravy, the layers of a lasagne, they all have layers and textures in the third dimension. Shooting at all the various angles between zero and 90 degrees lets the food stand out from the plate and provides a more realistic and emotion evoking representation of the food.
Background
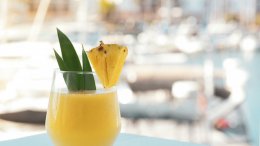
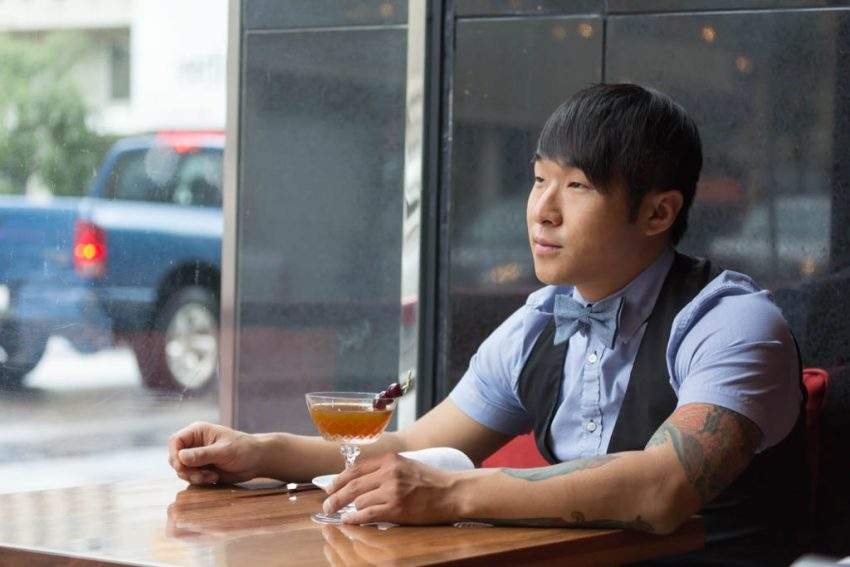
The other thing to keep in mind is to keep an eye on your background elements and be patient. Often, something happening out of your control in the background can spoil a perfect shot. The truck with its lights on outside the window is very distracting an removes the attention from the subject and the drink. This can happen in food photos with a dirty fork, a glass of water, or even another customer walking by. Look at what’s happening in the background and be patient to capture just the intended elements.
Paying attention to lighting and composition is a solid start to producing better photos, which more accurately and beautifully tells the story of the restaurant and your experience.